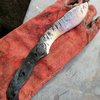
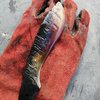
Forging knife blades for hunting knifes on Safari

Thanks for this. Keep it coming! Show some photos of your forge with a description, please. How are you cutting the leaf springs?
Leaf spring I forge the design to near finish dimensions, then sand the profile , if I need to cut it off the long piece I forge with since I do not use thongs , to me it is a dangerous thing since I have been burned previously when using a thong and the hot object fell from it..I rather start with a long piece of leaf spring steel which gives me a great hold on the whole piece of steel...that way I am in control the whole time..I then just cut the final product away with a grinder ...
 
Very impressive 2x72 belt sander @Gert Odendaal !

I must improve my belt sanders. I've got a 1x30 and a 4x36 as well as a 6" bench grinder that I use.. but have been looking hard at either trying to build my own 2x72 or perhaps purchase a 2x42 (they are MUCH less expensive than the 2x72 factory built machines.. but also a lot less versatile)..

For now I am only doing stock removal techniques.. I take steel forged into bars elsewhere, and use the bandsaw, an angle grinder, and then the belt and bench grinders to remove steel until I get the blade shape I want.. then heat treat prior to finishing things out, adding a handle, etc..

I'd like to get into forging.. but for now dont have the shop space available.. and am working out of a fairly close quarters wooden shed that concerns me a bit for playing with fire :)
 
Dave , I will be able to get a 2 "x 72" belt grinding machine build for you that you can just fit together, fit a motor and you will have a great functional belt grinding machine..you can take it back to your home when returning from your hunt in SA...just let me know when you want it build, it will be much, much less expensive than buying one in the USA...I can guarantee good quality components..I will take some photos of the one I am building now...and I can build you a one burner gas forge as well Here are the rollers I am using, the drive wheel is a 350mm diameter of the same type of roller here in this photo.the motor is a 2HP single phase I sourced from my De Walt radial arm saw .
054621b4-6834-4d0b-b012-b0b727f6b6b9.jpg
 
Last edited:
I'm still doing everything with angle grinders and a vice , I have clamped a belt sander in a vice on occasion when I absolutely needed a belt.
Skinnersblade, it is just another method to use that works for you..nothing wrong with using grinders and a vice to remove stock from a blank... you still get a great knife blade on the end of the day...the only reason I am building all these machines is because I really like building stuff and use it for a specific purpose ..(y)(y)(y)
 
Good members, I made some progress on phase two...fitting the knife handles from Weeping Boer- Bean Willow wood I cut from a large heavy old stump ....
Info in regards to this wood:
http://southafrica.co.za/weeping-boer-bean.html

Phase two : Cutting/fitting /epoxying the wood scales onto the knife blade:
If there is one great machine that really is a great tool to assist you work down the handle is the Hand grinder with a 40gn flapper disk on the grinder..it really is a machine /sander /wood removal tool first class:
a92d1af8-0a7f-47fb-a5d9-3e0b4f0ae302.jpg
7505a240-853c-4b76-b97c-01c5b5433f6a.jpg
12a19f37-b18e-4304-9d53-0291bb4a14e7.jpg
60bef84a-8a1b-449a-821a-b7d728641a67.jpg
798a0f63-3ee3-4d7e-829e-0d2f011dc591.jpg
980f3369-b537-4f03-b80e-3d69eb02595e.jpg
 
A tool I build that really is great when forging is a 2"x 2" x 11 " inch solid steel bar I use to straighten the blade when coming out of the forge...
354c545b-8ae0-4d4f-9fd8-184a992ab678.jpg

Making mosaic pins for this knife:
24bb1f8a-5e8c-4c27-910e-0d3e8cdbe5b0.jpg

Epoxy the scales and pins":
f4f5b07b-178b-41cb-8069-78ac6f3b32fe.jpg

Here is a photo of the Weeping Boer -Bean Willow wood when sanded and add some water to show what the wood looks like
dd461638-599d-4969-93e3-2d16bf180c32.jpg

Properties of the Weeping Boer -bean wood when working with it from my perspective:
It is a medium close grain wood...
It takes drilling well, sanding excellent when using a flapper disk and grinder, the belt sander is too fast and it burns the wood surface , I therefore dunk the wood into water when I sand it with course 40 gn sanding belt to avoid burning the wood.
It takes epoxy well , overall it is a nice wood to work with, not hard on a cutting blade at all ,,...I would recommend this wood for knife making ...
dd461638-599d-4969-93e3-2d16bf180c32.jpg
Here is a photo of the camp chopper with a skinning /camp hunting knife...the chopper still needs to be completed ...
0bed91b2-d97d-48bd-afd2-8068863c759c (1).jpg

Phase three:
Finishing the handle , finishing the blade, sharpening it tomorrow:
(y)(y)
 
Here is a photo of the components I will use in my current build of the second 2" x 72" belt grinding machine for knife making procedures...
SzQRGjN.jpg
 

Attachments

  • SzQRGjN.jpg
    SzQRGjN.jpg
    143.5 KB · Views: 58
I know you cast some of your wheels Gert but those have a commercial look to them. I have made some of my wheels (4 and 6 inch work wheel and 5 inch drive wheel) from 3 laminated hardwood boards laid at right angles to each other, that is ply construction
 
I am making my own charcoal to do forging, it is easy and cheap..any scrap pieces of wood will make good charcoal for own use ..coal is extremely expensive here in SA and it is virtually impossible to buy small quantities from mines ...

I buy mine from a foundry, any piece that falls on the floor is considered contaminated and can't be used by them.
 
Garry, they all are bought, I cast my first batch for my first 2" x 72" belt grinding machine...so I did not see the need to do it again, these wheels are good quality items and will work just fine for the second build...no need to do something I already done , doing it again if there are other means to complete a build...(y)(y) My other choice is to buy 50 mm aluminium solid round, and turn it on the lathe ..
 
Good, completed the knife...will do some polishing on the handle and seal it with beeswax...then buff it to a nice shine...will work nice in the hunting camp chopping impala carcasses and through bone when skinning and quartering the carcasses..
The beeswax will ensure no water or blood penetrates the wood handle..
bd94Bts.jpg

cgRUj50.jpg
J2JuGYf.jpg
B7zjREk.jpg
X2SHlLV.jpg


Piece of leaf spring in the centre of the two knifes is the same pieces I used to forged these two knifes...
Will use this raw piece of leaf spring to forge a fillet /thin meat slicing /de-boning knife that will look like these two brothers from the same mother..:LOL::LOL:(y)(y)
 

Attachments

  • bd94Bts.jpg
    bd94Bts.jpg
    82.9 KB · Views: 71
  • cgRUj50.jpg
    cgRUj50.jpg
    287.2 KB · Views: 69
  • J2JuGYf.jpg
    J2JuGYf.jpg
    455.3 KB · Views: 63
  • B7zjREk.jpg
    B7zjREk.jpg
    438.1 KB · Views: 93
  • X2SHlLV.jpg
    X2SHlLV.jpg
    94.4 KB · Views: 63
Last edited by a moderator:
Fascinating work! I am telling my brother kgesch about this thread! He is also very talented with many types of woodworking and has interest in this type of art as well. You are a gifted fellow. Thank you for sharing your talent.
 
Thank you Sir for the positive reply, it is much appreciated,,(y)(y)(y)
 
Good, spend more time on a third knife to be part of the first two knifes...using an off cut of the same leaf spring material...this will be a skinner ....and I am using another old piece of tool steel to forge a de-boning knife with an integral guard....here re some photos ...
Here is the off -cut piece I am forging a skinning knife :
hOnnxwe.jpg

I am nearly completed with this knife blade , will complete profiling it tomorrow
As you can see I did stretch this piece of off-cut considerably
5BpAGuv.jpg

Now a photo of the de-boning knife with integral guard , or I am trying to get the guard on the design as well , will see what I can do
LuCGPE0.jpg
WLV6vHS.jpg
 

Attachments

  • 5BpAGuv.jpg
    5BpAGuv.jpg
    122 KB · Views: 75
  • hOnnxwe.jpg
    hOnnxwe.jpg
    172.6 KB · Views: 65
  • LuCGPE0.jpg
    LuCGPE0.jpg
    83.1 KB · Views: 60
  • WLV6vHS.jpg
    WLV6vHS.jpg
    148.5 KB · Views: 66
Last edited by a moderator:
Gert you said (on my thread)

Today I need to make a fuller jig for my work ..mostly to insert the bolster part and work down the bolster part.

Are you going to do integral bolsters with that or are you going to use it to do the step from the blade width down to the tang width although is=f you made it rounded on one side and more squared on the other it would work for both I expect.
 
I see that you have a propper anvil but for those who cant justify the cost, it is not too hard to make one from what it found at the scrap/recyclers yard. we pay the equivelent of about 25US cents a lb for steel from there.
I found a hardened die there to use for the top that was a good 15 inches long by 5 inches wide so grabbed a short block of 8 x 6 x 4 mild steel and a length of 6 x 1 for the base.
I cut some off the die plate to make a step down and used some inch wearalloy plate to make hardy hole's and with it all welded together and bolted to a block of 12 x 2 timbers for a stand with a connecting plate to bolt a vise to I have a very effective piece of equipment for a very few dollars. You can see one of the hardy holes has a length of 2 inch round stock fitted so I have an alternative to a horn. I have a short length of 4 inch round stock toemulate the larger end of the horn so have about all I need to paly with this aspect of the obsession.
IMG_20200331_185659.jpg


The hardy hole is outboard of the main top plate but it dead nuts solid
IMG_20200331_185808.jpg


Not sure of the exact weight but but solid is solid and it has a nice rebound

IMG_20200331_185824.jpg


IMG_20200331_185839.jpg
 
Gert you said (on my thread)

Today I need to make a fuller jig for my work ..mostly to insert the bolster part and work down the bolster part.

Are you going to do integral bolsters with that or are you going to use it to do the step from the blade width down to the tang width although is=f you made it rounded on one side and more squared on the other it would work for both I expect.
Garry , thank you for the reply..I want to make the jig to do a step down where I can file out in less time a square angle to fit bolsters fitting while it is still heated up to forge temperatures...I would like to see how the jig looks like what you are using, and if it will work for what I have in mind..(y)(y)(y)
 
Garry, yes, I always explain to people that you do not need an anvil to commence forging as a hobby...any VNR piece of steel will be suffice...here in SA we are not able to get anvils anymore since it is a collectors item..and when some are sold it is for extremely high prices..for that money I can buy two or three solid blocks of VNR steel to make three anvils..
 

Forum statistics

Threads
58,430
Messages
1,257,272
Members
104,207
Latest member
VioletteFo


Latest posts

Latest profile posts

Hyde Hunter wrote on MissingAfrica's profile.
may I suggest Intaba Safaris in the East Cape by Port Elizabeth, Eugene is a great guy, 2 of us will be there April 6th to April 14th. he does cull hunts(that's what I am doing) and if you go to his web site he is and offering daily fees of 200.00 and good cull prices. Thanks Jim
Everyone always thinks about the worst thing that can happen, maybe ask yourself what's the best outcome that could happen?
Very inquisitive warthogs
faa538b2-dd82-4f5c-ba13-e50688c53d55.jpeg
c0583067-e4e9-442b-b084-04c7b7651182.jpeg
Big areas means BIG ELAND BULLS!!
d5fd1546-d747-4625-b730-e8f35d4a4fed.jpeg
 
Top